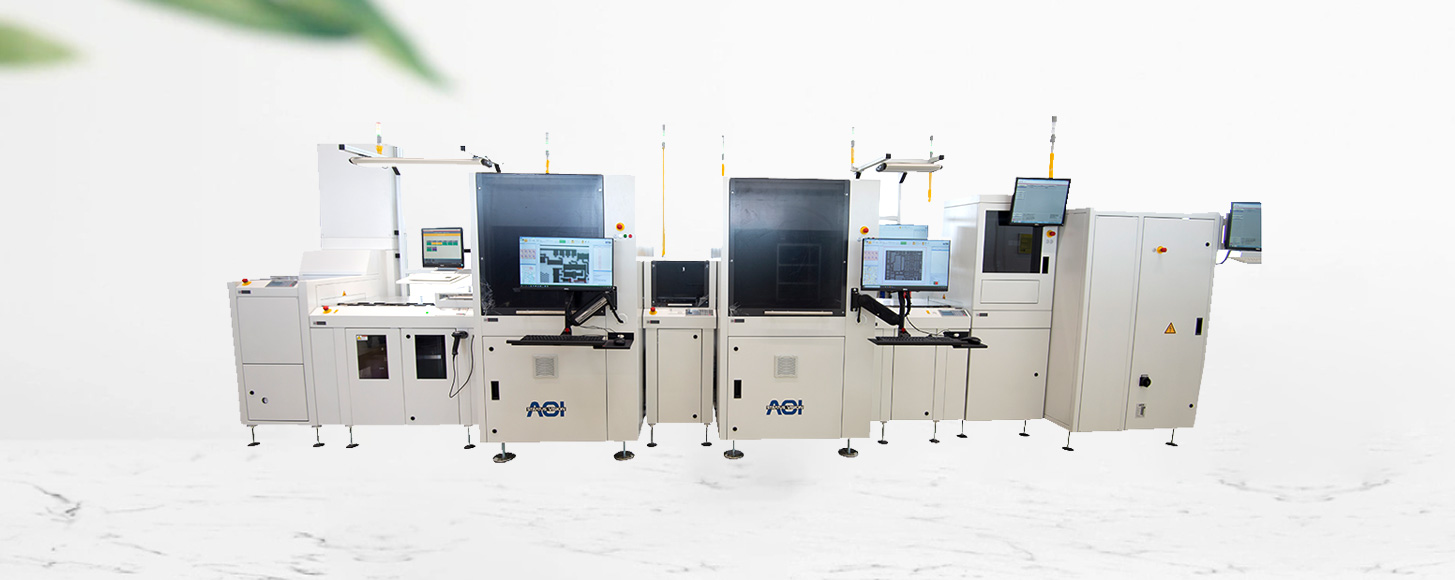
Aoi Inspection Machine
Automatic Optical inspection (AOI) solutions have in the meantime been developed to such a reliable level that manual inspection can be completely replaced. With the information collected through AOI systems, yields can be increased, critical defects prevented and production lines can be stopped before they continuously produce scrap.
Our experience and performance record speaks for itself, providing the fine difference, which in turn ensures our customers trust and using our ideas and expertise enable the customer to have a leading edge.
Our solutions utilise cutting edge technology and result in implementations that output high quality, high yield, application centred and process-safe production parts.
We pride ourselves in enabling our customers and developing long term products and relationships.
PASS and Stratus have enabled many new designs to satisfy new applications and fields. Foremost in the inspection field we wanted to offer not only the detection and evaluation of defects, but also provide the customer with all reports necessary to optimize their productions and improve their quality.
GENERAL SPECIFICATION
Material sizeup to 600x600mm
Thickness0.001 ~ 20mm
Type2D, 3D, Metrology
Resolutiondown to +/- 0.2µm or 0.0002mm
Machines
Manually Loaded

Stratus Desktop
A flexible solution for customers to measure and inspect against CAD data their substrates. This is the minimal solution available, and is suitable for customers with small volume inspection requirements or R&D.
i. Compact desktop automatic optical inspection solution for the 100% 2D inspectionii. High resolutions down to 2.5µm resolution. Enables the customer to inspect substrates accurately and repeatably. Also the customer can measure features on the substrate and produce reports on defects.iii. Inspect their substrates against CAD data.
TECHNICAL DATA
Machine dimensions Machine dimensions Inspection parameters
| Length x width x height | 646 X 501 X 535mm |
| Weight | 54Kg |
| Color | RAL 9003 |
| Power requirements | 230 V AC; 110V AC; 50/60Hz; 1+N+Ground |
| Power consumption | TBD |
| Full load current | 2A |
| Motors | Steppermotors |
| Operating Voltage | 24 V; 12 V |
| Air supply | NONE |
| Axle sideslip | 0.1MM |
| Temperature | 18.5°C +/- 8.5°C |
| Humidity | 50% +/- 25% |
| Maximum MOTOR speed | 600mm/sec |
| Camera | 5 Megapixel Areascan; 16k Linescan/sec |
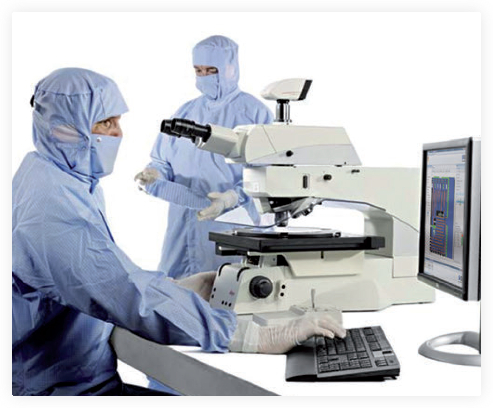
Stratus Nano
For GaAs, SiC, SIN, … wafer inspection solution for highest resolution 100% inspection and measurements.Also available with automatic loading and as extension for automatic Leica microscope installations.
a. Compact desktop automatic optical inspection solution for the 100% 2D inspection
b. High resolutions down to 0.25µm resolution.
c. Many operators are often necessary to inspect wafers with a manual microscope. This fully automatic inspection enables the customer to inspect substrates and accurately measure features on the substrate and produce reports on defects.
d. For GaAs, SiC, SIN, … wafer inspection solution for highest resolution 100% inspection and measurements.
TECHNICAL DATA
Machine dimensions Machine dimensions Inspection parameters
| Length x width x height | 646 X 501 X 535mm |
| Weight | 54Kg |
| Color | RAL 9003 |
| Power requirements | 230 V AC; 110V AC; 50/60Hz; 1+N+Ground |
| Power consumption | TBD |
| Full load current | 2A |
| Motors | Steppermotors |
| Operating Voltage | 24 V; 12 V |
| Air supply | NONE |
| Axle sideslip | 0.1MM |
| Temperature | 18.5°C +/- 8.5°C |
| Humidity | 50% +/- 25% |
| Maximum MOTOR speed | 600mm/sec |
| Camera | 5 Megapixel Areascan; 16k Linescan/sec |

Stratus III ECO
i. Compact automatic optical inspection solution for the 100% 2D inspection
ii. High resolutions down to 2.5µm resolution
iii. Substrate sizes up to 250x250mm
iv. Automatic Optical Inspection solution to inspection of most kinds of products.
Defect types range from excess paste, missing paste, smearing, narrowing, mouse bites, holes, via covering, sprayers, bleeding of paste, contamination, layer shifts, etc
TECHNICAL DATA
Machine dimensions Installation requirements Inspection parameters Substratre parameters
| Length x width x height (Approx.) | 1500 x 800 x 2500 mm |
| Weight (approx.) | 750 kg |
| Color | RAL 9003 |
| Power requirements | 230 V AC; 120V AC; 50/60Hz; 1+N+Ground |
| Power consumption approx. | 0.3 kW |
| Full load current approx. | 4.8 A |
| Fuse protection | 3 x 10 A |
| Operating voltage | 24 V; 12 V; 5 V |
| Air supply requirement | 6 bar |
| Air consumption approx. | 40 l/min |
| Temperature | 18.5°C +/- 8.5°C |
| Humidity | 50% +/- 25% |
| Maximum MOTOR speed | 500mm/sec |
| Camera | 5 Megapixel Areascan; 16k Linescan |
| Resolution | Maximum 2µm; Minimum 10µm |
| Maximum number of cameras | 4 of one type |
| Illuminations (up to 3 in automatic switch) | Multiple toplights (LEDs), backlight (LEDs) |
| Movement | X, Y, Z, Theta |
| Accuracy; Repeatability | +/- 2µm ; +/- 1µm |
| Maximum substrate size | 12” / 300 mm |
| Maximum substrate height | 1” / 2.5 mm |

Stratus III
Automatic Optical Inspection solution to inspection of most kinds of products.
i. Compact automatic optical inspection solution for the 100% 2D inspection
ii. High resolutions down to 2.5µm resolution
iii. Substrate sizes up to 250x250mm
iv. High precision 2D Metrology measurements
Defect types range from excess paste, missing paste, smearing, narrowing, mouse bites, holes, via covering, sprayers, bleeding of paste, contamination, layer shifts, substrate shrinking, screen aging, etc
i. Marking option
TECHNICAL DATA
Machine dimensions Installation requirements Inspection parameters Substratre parameters
| Length x width x height (Approx.) | 1500 x 800 x 2500 mm |
| Weight (approx.) | 800 kg |
| Color | RAL 9003 |
| Power requirements | 230 V AC; 120V AC; 50/60Hz; 1+N+Ground |
| Power consumption approx. | 0.3 kW |
| Full load current approx. | 4.8 A |
| Fuse protection | 3 x 10 A |
| Operating voltage | 24 V; 12 V; 5 V |
| Air supply requirement | 6 bar |
| Air consumption approx. | 40 l/min |
| Temperature | 18.5°C +/- 8.5°C |
| Humidity | 50% +/- 25% |
| Maximum MOTOR speed | 500mm/sec |
| Camera | 5 Megapixel Areascan; 16k Linescan |
| Resolution | Maximum 2µm; Minimum 10µm |
| Maximum number of cameras | 2 of one type |
| Illuminations (up to 3 in automatic switch) | Multiple toplights (LEDs), backlight (LEDs) |
| Movement | X, Y, Z, Theta |
| Accuracy; Repeatability | +/- 2µm ; +/- 1µm |
| Maximum substrate size | 12” / 300 mm |
| Maximum substrate height | 1” / 15 mm |

Offline Flex Machine
i. Automatic inspection solution for the 100% 2D inspection
ii. High resolution down to 1µm resolution
iii. Substrate sizes up to 450x450mm
iv. Automatic Optical Inspection solution to inspection of most kinds of products.
v. Very high precision 2D Metrology measurements
vi. 3D Metrology measurements
Defect types range from excess paste, missing paste, smearing, narrowing, mouse bites, holes, via covering, sprayers, bleeding of paste, contamination, layer shifts, etc
TECHNICAL DATA
Machine dimensions Installation requirements Inspection parameters Circuit parameters
| Length x width x height | 1687 x 1600 x 2128 mm |
| Weight | 1000 kg |
| Color | RAL 9003 |
| Power requirements | 220 V AC; 110V AC; 50/60Hz; 1+N+Ground |
| Power consumption | 0.5 kW |
| Full load current | 4.8 A @ 110V; 2.4 A @ 220V |
| Fuse protection | 3 x 10 A |
| Operating Voltage | 24 V; 12 V; 5 V |
| Air supply | 6 bar |
| Air consumption | 40 l/min |
| Temperature | 18.5°C +/- 8.5°C |
| Humidity | 50% +/- 25% |
| Maximum MOTOR speed | 600mm/sec |
| Camera | 5 Megapixel Areascan; 16k Linescan/sec |
| Resolution | Maximum 1.5µm; Minimum 10µm |
| Maximum number of cameras | 4 of one type |
| Lights | Multiple toplights (LEDs), backlight (LEDs) |
| Movement | X, Y, Z, Theta |
| Accuracy; Repeatability | +/- 2µm ; +/- 0.8µm |
| Measurement Accuracy | 1µm + 5L/1000 (L in mm) |
| Maximum size | 9” / 225 mm |
| Maximum circuit height | 0.8” / 20 mm |

Stratus Laser LMM Metrology
i. High precision automatic optical inspection AOI with manual loading
ii. Focused on wafer inspection and metrology and inspection of TSV and laser drilled structures.
iii. Automatic inspection solution for the 100% 2D inspection
iv. High resolutions down to approx. 1µm resolution
v. Substrate sizes up to 650x650mm
vi. Automatic Optical Inspection solution to inspection of most kinds of products.
vii. Very high precision 2D Metrology measurements
viii. 3D Metrology measurements
ix. Defect types range from excess paste, missing paste, smearing, narrowing, mouse bites, holes, via covering, sprayers, bleeding of paste, contamination, layer shifts, etc
x. SECS/GEM integration
TECHNICAL DATA
Machine dimensions Installation requirements Inspection parameters Circuit parameters
| Length x width x height | 870 x 780 x 1585 mm |
| Weight | 1000 kg |
| Color | RAL 9003 |
| Power requirements | 220 V AC; 110V AC; 50/60Hz; 1+N+Ground |
| Power consumption | 0.5 kW |
| Full load current | 4.8 A @ 110V; 2.4 A @ 220V |
| Fuse protection | 1 x 10 A |
| Operating voltage | 24 V; 12 V; 5 V |
| Air supply | 6 bar |
| Air consumption | 40 l/min |
| Temperature | 18.5°C +/- 8.5°C |
| Humidity | 50% +/- 25% |
| Maximum MOTOR speed | 600mm/sec |
| Camera | 16k Linescan |
| Resolution | Maximum 6µm; Minimum 10µm |
| Maximum number of cameras | 1 |
| Lights | Multiple toplights(LEDs) |
| Movemen | Y |
| Accuracy; Repeatability | +/- 2µm ; +/- 0.8µm |
| Measurement Accuracy | 1µm + 5L/1000 (L in mm) |
| Maximum size | 7.6” / 192 mm |
| Maximum circuit height | 0.8” / 20 mm |

Glass Inspect
i. High precision automatic optical inspection AOI with manual loading
ii. Focused on inspection and metrology and inspection of glass wafers and glass substrates.
iii. Automatic inspection solution for the 100% 2D inspection
iv. High resolutions down to approx. 1µm resolution
v. Substrate sizes up to 650x650mm
vi. Very high precision 2D Metrology measurements
vii. 3D Metrology measurements
viii. Defect types range from excess paste, missing paste, smearing, narrowing, mouse bites, holes, via covering, sprayers, bleeding of paste, contamination, layer shifts, etc
ix. SECS/GEM integration
TECHNICAL DATA
Machine dimensions Installation requirements Inspection parameters
| Length x width x height | 1600 x 1600 x 200 mm |
| Weight | 1400 kg |
| Color | RAL 9003 |
| Power requirements | 220 V AC; 110V AC; 50/60Hz; 1+N+Ground |
| Power consumption | 0.5 kW |
| Full load current | 4.8 A @ 110V; 2.4 A @ 220V |
| Fuse protection | 3 x 10 A |
| Operating Voltage | 24 V; 12 V; 5 V |
| Air supply | 6 bar |
| Air consumption | 40 l/min |
| Temperature | 18.5°C +/- 8.5°C |
| Humidity | 50% +/- 25% |
| Maximum MOTOR speed | 600mm/sec |
| Camera | 5 Megapixel Areascan |
| Resolution | Maximum 1µm; Minimum 10µm |
| Maximum number of cameras | 2 of one type |
| Lights | Multiple toplights (LEDs) |
| Movement | X, Y, Z |
| Accuracy; Repeatability | +/- 2µm ; +/- 0.8µm |
| Measurement Accurac | 1µm + 5L/1000 (L in mm) |
| Maximum size | 20” / 500mm |
| Maximum circuit height | 0.8” / 20mm |

Wafer Inspect
i. High precision automatic optical inspection AOI with manual loading
ii. Focused on wafer and wafer probe card inspection and metrology.
iii. Automatic inspection solution for the 100% 2D inspection
iv. High resolutions below 1µm resolution
v. Substrate sizes up to 400x400mm
vi. Very high precision 2D Metrology measurements
vii. 3D Metrology measurements
viii. Defect types range from excess paste, missing paste, smearing, narrowing, mouse bites, holes, via covering, sprayers, bleeding of paste, contamination, layer shifts, etc
ix. SECS/GEM integration
TECHNICAL DATA
Machine dimensions Machine dimensions Inspection parameters
| Length x width x height | 646 X 501 X 535mm |
| Weight | 54Kg |
| Color | RAL 9003 |
| Power requirements | 230 V AC; 110V AC; 50/60Hz; 1+N+Ground |
| Power consumption | TBD |
| Full load current | 2A |
| Motors | Steppermotors |
| Operating Voltage | 24 V; 12 V |
| Air supply | NONE |
| Axle sideslip | 0.1MM |
| Temperature | 18.5°C +/- 8.5°C |
| Humidity | 50% +/- 25% |
| Maximum MOTOR speed | 600mm/sec |
| Camera | 5 Megapixel Areascan; 16k Linescan/sec |

INREMA
i. High precision automatic optical inspection AOI with manual loading
ii. Focused on reticle/ chrome mask inspection and metrology.
iii. Automatic inspection solution for the 100% 2D inspection
iv. High resolution down to 0.2 µm resolution
v. Substrate sizes up to 650x650mm
vi. Automatic quality certificate for defect assurance
vii. Automatic Optical Inspection solution to inspection of most kinds of products.
viii. Very high precision 2D Metrology measurements
ix. 3D Metrology measurements
x. Defect types range from excess paste, missing paste, smearing, narrowing, mouse bites, holes, via covering, sprayers, bleeding of paste, contamination, layer shifts, etc
xi. SECS/GEM integration
TECHNICAL DATA
Machine dimensions Installation requirements Inspection parameters Circuit parameters
| Length x width x height | 1800 x 1800 x 1600 mm |
| Weight | 1500 kg |
| Color | RAL 9003 |
| Power requirements | 220 V AC; 110V AC; 50/60Hz; 1+N+Ground |
| Power consumption | 0.5 kW |
| Full load current | 4.8 A @ 110V; 2.4 A @ 220V |
| Fuse protection | 3 x 10 A |
| Operating Voltage | 24 V; 12 V; 5 V |
| Air supply | 6 bar |
| Air consumption | 70 l/min |
| Temperature | 18.5°C +/- 8.5°C |
| Humidity | 50% +/- 25% |
| Maximum inspection speed | 120mm²/sec |
| Camera | 5-10 Megapixel Areascan |
| Resolution | Maximum 300 nm; Minimum 1 µm |
| Maximum number of cameras | 2; Overview and Inspection camera |
| Lights | Multiple toplights (LEDs); Backlight for Inspection |
| Movement | X, Y, Z; Complete Air bearing with ironcoreless |
| Accuracy; Repeatability | +/- 1µm ; +/- 0.25µm |
| Specialty | Defect report output file; On the fly program generation; Die to Database, QMS integration; |
| Mask size | 5”; 6”, 7”; 8”; 9”; 12”; 14” (Ask for other sizes) |
| Maximum circuit height | 0.8” / 20 mm |
| Material support for | Quartz Glas; Sodalime; Boroflat |
| Surface Material | High-reflective Chrome; Anti-reflective Chrome |
| Verfication procedure | Verimask; Compugraphics Quali-Mask#1020 |

MVI Metrology
i. Focused on Via/ Shape inspection and metrology.
ii. High resolutions below 2.5µm resolution
iii. Substrate sizes up to 300x400mm
iv. Automatic quality certificate for defect assurance
v. Automatic Optical Inspection solution to inspection of most kinds of products.
vi. Defect types range from hole position, cavity position, size verification, dimensional tolerance, via covering, etc
TECHNICAL DATA
Machine dimensions Installation requirements Inspection parameters Circuit parameters
| Length x width x height | 870 x 780 x 1585 mm |
| Weight | 1000 Kg |
| Color | RAL 9003 |
| Power requirements | 220 V AC; 110V AC; 50/60Hz; 1+N+Ground |
| Power consumption | 0.5 kW |
| Full load current | 4.8 A @ 110V; 2.4 A @ 220V |
| Fuse protection | 1 x 10 A |
| Operating Voltage | 24 V; 12 V; 5 V |
| Air supply | 6 bar |
| Air consumption | 40 l/min |
| Temperature | 18.5°C +/- 8.5°C |
| Humidity | 50% +/- 25% |
| Maximum MOTOR speed | 600mm/sec |
| Camera | 16k Linescan |
| Resolution | Maximum 6µm; Minimum 10µm |
| Maximum number of cameras | 1 |
| Lights | Multiple toplights (LEDs) |
| Movement | Y |
| Accuracy; Repeatability | +/- 2µm ; +/- 0.8µm |
| Measurement Accuracy | 1µm + 5L/1000 (L in mm) |
| Maximum size | 7.6” / 192mm |
| Maximum circuit height | 0.8” / 20mm |
Automatically loaded

Stratus III inline
Our Stratus III Inline solution is our automatic solution to inspect rigid boards (Ceramic, PCB, etc.) in an automated conveyor based solution. This system offers maximum speed and toplight flexibility with great cost efficiency. Substrates up to a size of 10″ x 10″ can be inspected for excess paste, missing paste, smearing, narrowing, mouse bites, holes, via covering, sprayers, bleeding of paste, contamination, print shifts, substrate shrinking, screen aging, etc, and it differentiates between random and serial defects.
TECHNICAL DATA
Machine dimensions Installation requirements Inspection parameters Inspection parameters
| Length x width x height | 1490 x 1000 x 2781 mm |
| Weight | 850 kg |
| Color | RAL 9003 |
| Installation requirements | 230 V AC; 110V AC; 50/60Hz; 1+N+Ground |
| Power consumption | 1 kW |
| Full load current | 5.8 A @ 110V |
| Fuse protection | 3 x 10 A |
| Operating voltage | 24 V; 12 V; 5 V |
| Air supply | 6 bar |
| Air consumption | 40 l/min |
| Temperature | 18.5°C +/- 8.5°C |
| Humidity | 50% +/- 25% |
| Maximum inspection speed | 600mm/sec |
| Camera | 5 Megapixel Areascan; 16k Linescan/sec |
| Resolution | Maximum 2µm; Minimum 10µm |
| Maximum number of cameras | 4 of one type |
| Lights | Multiple toplights (LEDs), backlight (LEDs) |
| Movement | X, Y, Z, Theta |
| Accuracy; Repeatability | +/- 2µm ; +/- 0.8µm |
| Automation possibilities | Left in/out; Right in/out; Left in/ Right out |
| Maximum weight for part | 0.5 kg |
| Placement accuracy | +/- 1 mm |
| Conveyor height | 950mm +/- 50mm SMEMA standard |
| Magazine handlers or further inline equipment must be agreed upon contract signature | |
| Maximum size; Minimum Size | 12” / 300 mm; 2” / 50 mm |
| Maximum circuit height | 0.8” / 20 mm |

Inline Hybrid
i. High precision automatic optical inspection AOI
ii. Automatic loading inline or from cassette and magazine
iii. Automatic inspection solution for the 100% 2D inspection
iv. High resolutions e.g. 1.5 µm resolution
v. Substrate sizes up to 155x250mm
vi. Automatic Optical Inspection solution to inspection of most kinds of products.
vii. Very high precision 2D Metrology measurements/ die placement/ critical defect positions
viii. 3D Metrology measurements
ix. Die Placement Metrology
x. Au, Al, Ag, and Cu Wires inspection
xi. Wedge, Ball, and Stitch Wire Bonds
xii. Defect types range from excess material, missing material, smearing, narrowing, cracks, die surface inspection, holes, via covering, sprayers, bleeding of paste, contamination, layer shifts, epoxy spread and bridging, etc
TECHNICAL DATA
Machine dimensions Connection Inspection parameters Operation Conditions
| Length x width x height | 1445 mm x 800 mm x 1788 mm |
| Weight | 600 kg |
| Color | RAL 9003 |
| Welded Steel | frame |
| Granite | base |
| Flexible Monitor | arm |
| Voltage | 110V AC to 240V AC |
| Current | 4.8 Amps to 2.2 Amps |
| Frequenzy | 50 to 60 Hertz |
| Network | Ethernet RJ45 |
| Air | 6 bar |
| Air consumption | 40l / min |
| Camera | Areascan, Linescan and 3D |
| Resolution | 1µm to 15µm |
| Lens | Telecentric, Bicentric or |
| Operating Temperature | 18.5°C +/- 8.5°C |
| Operating Humidity | 50% +/- 25% |
| Power Consumption | 0.5kW average |

Inline Flex
i. High precision automatic optical inspection AOI of rigid and flexible substrates
ii. Automatic loading from tray, stack, cassette and magazine
iii. Automatic inspection solution for the 100% 2D inspection
iv. High resolutions e.g. 1.5 µm resolution
v. Larger substrate sizes
vi. Very high precision 2D Metrology measurements/ die placement/ critical defect positions
vii. 3D Metrology measurements
viii. Defect types range from excess material, missing material, smearing, narrowing, cracks, die surface inspection, holes, via covering, sprayers, bleeding of paste, contamination, layer shifts, epoxy spread and bridging, etc
TECHNICAL DATA
Machine dimensions Installation requirements Inspection parameters Circuit parameters
| Length x width x height | 1687 x 1600 x 2128 mm |
| Weight | 1000 kg |
| Color | RAL 9003 |
| Power requirements | 220 V AC; 110V AC; 50/60Hz; 1+N+Ground |
| Power consumption | 0.5 kW |
| Full load current | 4.8 A @ 110V; 2.4 A @ 220V |
| Fuse protection | 3 x 10 A |
| Operating voltage | 24 V; 12 V; 5 V |
| Air supply | 6 bar |
| Axle consumption | 40 l/min |
| Temperature | 18.5°C +/- 8.5°C |
| Humidity | 50% +/- 25% |
| Maximum inspection speed | 600mm/sec |
| Camera | 5 Megapixel Areascan; 16k Linescan |
| Resolution | Maximum 1.5µm; Minimum 10µm |
| Maximum number of cameras | 4 of one type |
| Lights | Multiple toplights (LEDs), backlight (LEDs) |
| Movement | X, Y, Z, Theta |
| Accuracy; Repeatability | +/- 2µm ; +/- 0.8µm |
| Measurement Accuracy | 1µm + 5L/1000 (L in mm) |
| Maximum size | 9” / 225mm |
| Maximum circuit height | 0.8” / 20mm |

Stratus AW
i. High precision automatic optical inspection AOI 3D/2D metrology and inspection system for high speed, high resolution and high accuracy wafer-level and advanced packaging applications
ii. Automatic robotic loading from cassette and magazine
iii. Automatic inspection solution for the 100% 2D inspection
iv. High resolutions e.g. 0.2 µm resolution
v. Substrate sizes up to 350x350mm
vi. Very high precision 2D Metrology measurements/ die placement/ critical defect positions
vii. 3D Metrology measurements
viii. Defect types range from excess material, missing material, smearing, narrowing, cracks, die surface inspection, holes, via covering, sprayers, bleeding of paste, contamination, layer shifts, epoxy spread and bridging, wafer bump, solder bump, etc
ix. SECS/GEM standards implemented
TECHNICAL DATA
Machine dimensions Installation requirements Inspection parameters Circuit parameters
| Length x width x height | – |
| Weight | – |
| Color | – |
| Power requirements | – |
| Power consumption | – |
| Full load current | – |
| Fuse protection | – |
| Operating voltage | – |
| Air supply | – |
| Axle consumption | – |
| Temperature | – |
| Humidity | – |
| Maximum inspection speed | – |
| Camera | – |
| Resolution | – |
| Maximum number of cameras | – |
| Lights | – |
| Movement | – |
| Accuracy; Repeatability | – |
| Measurement Accuracy | – |
| Maximum size | – |
| Maximum circuit height | – |

Inline MVI Metrology
i. High precision automatic optical inspection AOI 2D inline metrology
ii. Automatic loading from tray, carrier, stack, cassette and magazine
iii. Measurement accuracy +/-2.5µm@6 sigma
iv. Fast via inspection and measurement, e.g. 100.000 holes in 60 seconds
v. SECS/GEM standards implemented
TECHNICAL DATA
Machine dimensions Installation requirements Inspection parameters
| Length x width x height | 870 x 780 x 1585 mm |
| Weight | 1000 kg |
| Color | RAL 9003 |
| Power requirements | 220 V AC; 110V AC; 50/60Hz; 1+N+Ground |
| Power consumption | 0.5 kW |
| Full load current | 4.8 A @ 110V; 2.4 A @ 220V |
| Fuse protection | 1 x 10 A |
| Operating Voltage | 24 V; 12 V; 5 V |
| Air supply | 6 bar |
| Air consumption | 40 l/min |
| Temperature | 18.5°C +/- 8.5°C |
| Humidity | 50% +/- 25% |
| Maximum inspection speed | 600mm/sec |
| Camera | 16k Linescan |
| Resolution | Maximum 6µm; Minimum 10µm |
| Maximum number of cameras | 1 |
| Lights | Multiple toplights (LEDs) |
| Movement | Y |
| Accuracy; Repeatability | +/- 2µm ; +/- 0.8µm |
| Measurement Accuracy | 1µm + 5L/1000 (L in mm) |
| Maximum size | 7.6” / 192 mm |
| Maximum circuit height | 0.8” / 20 mm |
Customized Production lines

